
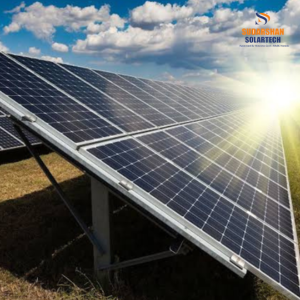
Thinking about installing solar panels at home? You’re not the only one who have thinking about this Over the last few years, more homeowners have started switching to solar because it helps reduce electricity bills and makes good use of clean energy. While the idea of installing a solar system might sound complicated at first, the process is actually quite straightforward when you know what to expect.
How to Install Solar Panels at Home :
Have you ever looked at your electricity bill and thought, You are definitely not the only one. With power costs increasing almost every year, many homeowners are now turning to solar energy as a smart and long-term solution. It’s one of those upgrades that not only helps you save money every month.
Installing solar panels at home isn’t as confusing as many people think. Once you understand the basic process, it actually becomes much easier to know what to expect. From checking whether your roof is suitable to choosing the right system size and getting everything connected, the installation follows a series of simple steps.
Why Install Solar Panels at Home?
The biggest reason most people choose solar is simple—it saves money. Once your system starts generating electricity, you’ll notice a big difference in your monthly power bills.
Besides saving money, solar panels also have a few other benefits:
Lower electricity bills.
Clean and renewable energy.
Low maintenance costs.
Increases the value of your home.
It’s one of those investments that keeps paying you back year after year.
Step 1: Check Your Roof
Before anything else, have a good look at your roof. Solar plates need enough sunlight during the day to produce maximum electricity.
A few things for check:
Is your roof strong enough?
Does it receive direct sunlight?
Are there trees or buildings creating too much shade?
If your roof checks these boxes, you are already has to a good start.
Step 2: Calculate Your Electricity Usage
Don’t buy a solar system just because your neighbour installed one.
Take a look at your electricity bills from the last 6 to 12 months. This will give you a clear idea of how much electricity your home actually uses.
For example:
2 kW System – Suitable for small families.
3 kW System – Good for average households.
5 kW System – Ideal for larger homes with higher electricity usage.
Choosing the right system size helps you avoid spending more than necessary.
Step 3: Choose Quality Solar Panels
Not all solar panels are the same There are many varites in this.
While cheaper panels may seem attractive, good-quality panels generally perform better and last longer. It’s also worth paying attention to the inverter, since it’s one of the most important parts of the system.
A reliable installer will help you choose products that match both your budget and your electricity needs.
Step 4: Get the Mounting Structure Installed
the mounting structure is fixed to the roof.
This structure keeps the solar panels secure and positioned at the right angle to receive maximum sunlight. Good-quality mounting structures are important because they will need to with stand rain, strong winds, and changing weather for many years.
Step 5: Install the Solar Panels
Once the mounting structure is ready, the solar panels are carefully installed and secured.
After that, the solar panels are connected together using special solar cables. At this stage, everything is checked to make sure the connections are safe and properly fitted.
Step 6: Install the Solar Inverter
The electricity produced by solar panels is DC (Direct Current), but most household appliances use Alternating Current.
That’s where the inverter comes in. It converts DC electricity into AC electricity so you can use it in your home.
Without a good inverter, your solar system simply won’t work efficiently.
Step 7: Connect to the Main Electrical System
The installer will now connect the inverter to your home’s electrical panel.
If you’re installing an on-grid solar system, you’ll also need net metering. This allows extra electricity generated during the day to be sent back to the electricity grid.
Depending on your location, your installer can also help with the paperwork required for net metering and government subsidies.
Step 8: Testing and Final Inspection
Before the system is switched on, the installer performs a complete inspection.
They’ll check:
Panel connections.
Inverter performance.
Safety features.
Power generation.
Electrical wiring.
Once everything looks good, your solar system is ready to start producing electricity.
How Much Does Home Solar Installation Cost?
The total cost depends on several factors, including these terms:
System size.
Solar panel brand.
Inverter quality.
Roof type.
Installation charges.
Maintenance Tips
The good news is that solar panels don’t require much maintenance.
Just remember to:
Clean the panels every few weeks if dust builds up.
Remove leaves or debris.
Check the inverter display occasionally.
A little maintenance goes a long way in keeping your system running efficiently.
Final Thoughts:
Installing solar panels at home is one of the smartest long-term investments you can make. It helps lower your electricity bills, increases your home’s value, and supports a cleaner environment.
You can check Sudarsahan solar tech . That company emphasizes quality products, skilled installation, and long-term customer support. From planning the system to installation and maintenance, they aim to provide a hassle-free experience for every customer